Vinyl tiles vs. sheet vinyl: a comprehensive comparison

Our latest guide to sheet vinyl flooring and luxury vinyl tiles and how they compare to each other.

When it comes to choosing flooring options, vinyl tiles and sheet vinyl are two popular contenders that often spark debate among homeowners and designers alike. Both materials offer a range of benefits, but they cater to different needs and aesthetics. In this article, we’ll delve into the key differences, advantages, and disadvantages of vinyl tiles and sheet vinyl to help you make an informed decision for your space.

Vinyl Flooring Options

Vinyl flooring is available to buy on the roll (vinyl sheet flooring) and as luxury vinyl tiles and planks.

Luxury vinyl tiles and vinyl planks – these are individual squares or planks of vinyl flooring. They are available in various sizes and designs, to produce a realistic wood- or stone-effect finish.

Vinyl roll flooring, on the other hand, is a large roll of vinyl that can cover an entire room without seams, providing a continuous surface. It’s available in numerous colours, and a choice of patterns, making it a versatile option.

Installation of LVT

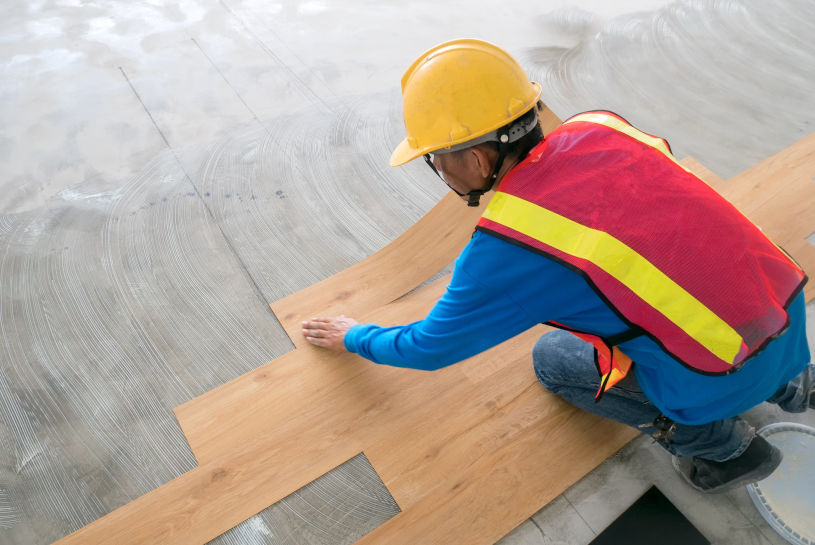
Installation of vinyl tiles can be straightforward, especially with self-adhesive options. While homeowners with some DIY skills could lay them down themselves, it is vital to ensure a perfectly even surface with a perfectly prepared subfloor (see Preparing your sub-floor for luxury vinyl plank flooring), as imperfections can lead to a less attractive final product. At Floors for Paws, we have a network of reputable installation engineers that we always recommend, to give you the optimum finish for your new floor.

Installation of sheet vinyl flooring

Sheet vinyl benefits from professional installation, as the large roll must be cut to size, which can be challenging without professional tools. Moreover, it’s crucial to get the measurements just right to avoid seams that could lead to water infiltration. The cost of a professional installer can be offset by the benefits of a smoother and more visually appealing finish.

Aesthetics

Vinyl tiles – vinyl tiles offer significant versatility in design. With a wide array of patterns, colours, they mimic natural materials like hardwood, stone, or ceramic. This allows homeowners to create unique looks tailored to their personal style. Moreover, the ability to mix and match tiles can lead to creative designs, like borders or patterns such as herringbone.

Sheet Vinyl – while sheet vinyl also comes in various styles, it does not offer the same level of customisation as tiles. However, it does excel in creating seamless designs that can give the appearance of a larger, uninterrupted floor. This can be particularly beneficial in smaller spaces where visual continuity helps make the area feel larger, or in areas that will be subject to frequent and vigorous cleaning.

Durability and maintenance

Vinyl tiles – vinyl tiles are durable and resistant to scratches and stains. However, the seams between tiles can trap dirt and moisture if not properly maintained. Regular sweeping and mopping with a damp cloth are usually sufficient to keep them clean. They also have the added advantage of being easily replaceable; if a tile becomes damaged, it can be removed and replaced without affecting the surrounding floor. For detailed advice om maintaining your LVT flooring, see How to clean vinyl floors – a guide for pet owners.

Sheet vinyl – vinyl roll flooring is known for its exceptional durability and water resistance. Its seamless nature means fewer places for dirt and moisture to accumulate, making it easier to maintain in high-traffic areas or spaces prone to spills, like kitchens and bathrooms. However, once damaged, repairing sheet vinyl can be more complicated, often requiring a whole section to be replaced.

Cost

When it comes to cost, vinyl tiles are often more expensive per square metre than sheet vinyl. However, the overall expense may balance out if you consider installation costs and the potential for DIY work. Sheet vinyl, while generally cheaper upfront, may incur additional costs for professional installation due to its complexity.

LVT and vinyl roll flooring from Floors for Paws

At Floors for Paws, our Pawsafe Domestic range and our Luxury Vinyl range is made up of both tiles and planks. The Pawsafe Domestic range has been endorsed by Canine Arthritis Management and is recommended for pets for its non-slip qualities and comfort layer. Pet owners also love it for its good looks, low maintenance and scratch resistance. Our Pawsafe Commercial range is supplied on the roll (like carpet) and is recommended for high traffic areas such as veterinary clinics and surgeries, canine cafes and dog daycare centres. To find out more, read our guide to commercial non-slip vinyl flooring.

Both vinyl tiles and sheet vinyl present their own unique benefits and drawbacks, and the choice largely depends on your specific needs, budget, and aesthetic preferences. To discuss which option suits your current needs, call the team on 01522 300218 or send us an email to info@floorsforpaws.com

How to install sheet vinyl flooring – a complete guide

At Floors for Paws we install our sheet vinyl flooring using the full stick method. Read on to find out more!

When laying sheet vinyl, installation professionals use one of two methods, known as loose lay and full stick. As the names imply, loose lay involves applying adhesive around the edge of the room only and full stick is when the entire floor surface has adhesive applied.

How to lay sheet vinyl flooring using the loose lay method

  • Unroll the vinyl alongside the longest wall, about 25 mm away from the skirting.
  • When cutting the sheet vinyl, first use a bolster chisel to press the vinyl into the angle between the floor and skirting. This will make a crease in the vinyl which will be your guideline when cutting. Using a sharp blade, cut the vinyl at an angle for a clean finish.
  • Once the sheet vinyl has been cut to size, use a broom to smooth the vinyl down. Work from the centre of the floor out to the edge as this will remove air bubbles which will help to vinyl to stick better.
  • Once the vinyl has been smoothed down, lift eh edges away from the floor and apply adhesive around the edge of the room. Press the sheet flooring down firmly and leave to dry for 45-60 minutes.
  • If you have to join pieces if sheet vinyl, for example in larger areas, secure seams with a seam sealer and double sided adhesive tape.

How to install vinyl flooring using the full stick method

  • Prepare the subfloor for the vinyl by ensuring it is clean and level. Make sure to remove and imperfections and clear all debris. If your subfloor is level and smooth, full stick sheet vinyl flooring requires no underlay but if you’d like to find out more, see our vinyl floor preparation blog posts.
  • Unroll the vinyl, as above, along the longest wall. Make the vinyl lie flat by cutting triangular notches at every internal corner, with scissors.
  • When applying the glue, fold half of the vinyl back and apply adhesive to the floor. Replace the vinyl, pressing it down firmly. Repeat the process for the other half of the vinyl.
  • Wipe off any adhesive that got on top of the floor with a cleaner.

What about the seaming?

Where two lengths of vinyl need to be joined, seams can be heat welded or chemical welded. Chemical welding involves a chemical liquid being applied between the seams. This creates a reaction that fuses the two pieces together. If too little sealer is used, a weak weld will result and if too much is used, the surface area may become flooded.

By contrast, hot joint welding involves the application of heat to fuse the seams, at least 24 hours post-installation so the heat does not affect the adhesive used. Involving a similar technique to soldering, heat welded seams are recommended wherever a waterproof or sterile environment is needed, for example in healthcare settings such as veterinary practices.

Commercial sheet vinyl flooring from Floors for Paws

At Floors for Paws, we supply the Pawsafe Commercial range of sheet flooring, endorsed by Canine Arthritis Management. We always recommend that our flooring is installed by professional tradespeople that we know and trust and whose work we are sure of, all of whom use the full stick method with hot welded seams. To see our full range of commercial flooring and to order up to three free samples, click here. For any other questions, contact the team at info@floorsforpaws.com or give us a call on 01522 300218.

Glue down LVT – Floors for life

glue down LVT

Glue down LVT (luxury vinyl tile) is often considered better than click-lock (floating) LVT for several reasons:

Stability and Durability

Glue down LVT is more stable because it is adhered directly to the subfloor, which minimizes movement. This makes it a better choice for areas with heavy foot traffic or where furniture is frequently moved.

Because glue-down LVT is firmly attached to the subfloor, it tends to be more durable and longer-lasting. This type of installation can handle more wear and tear without coming loose.

Sound absorption and Feel

Glue down LVT tends to produce less noise because it is solidly adhered to the subfloor, reducing the hollow sound that can sometimes occur with floating floors.

Glue down LVT generally feels more solid underfoot because there is no air gap between the flooring and the subfloor. This can provide a more authentic feel, similar to natural materials like wood.

Versatility and Performance

Glue down LVT can be installed in a wider range of environments, including areas with fluctuating temperatures and humidity levels, such as sunrooms or basements.

Performance in Moist Areas

Because it is adhered directly to the subfloor, glue-down LVT is less likely to trap moisture underneath, which can be beneficial in moisture-prone areas like bathrooms and kitchens.

Cost and Installation

In case of damage, individual glue-down tiles can be replaced without disturbing the surrounding tiles, which is not possible with click-lock systems.

Aesthetics

Glue down LVT does not need scotia against skirting boards as it does not shrink and contract so you can have a neat finish in all rooms.

Conclusion

Glue-down LVT is often favoured for its stability, durability, better sound absorption, solid feel underfoot, versatility in various environments, performance in moist areas, and ease of repair. However, it requires a more complex installation process compared to click-lock LVT, which is generally easier and quicker to install. The best choice depends on the specific needs and conditions of the space where the flooring will be installed.

The importance of choosing glue down LVT over click-lock for dog owners is that it is fully waterproof against doggy accidents ad water bowl spills.

Pet-friendly LVT from Floors for Paws

Our luxury vinyl flooring range offers customers a choice of 6 stone-effect finishes and 6 wood-effect finishes to appeal to all tastes. To help you narrow your choice, order up to three free samples today.

Floors for Paws Luxury vinyl range


How to fit LVT herringbone flooring

herringbone flooring


For dog owners who want the luxury of a high end, solid wood parquet block floor but who worry about the safety of their pets, look no further. At Floors for Paws, we have the perfect solution – LVT herringbone flooring.

What is herringbone flooring?

Often used when talking about wooden parquet flooring, the term herringbone is in fact one of the most popular patterns that can be created with any type of block flooring. The pattern is created from rectangular wooden blocks which are each arranged at a 45 degree angle from the next to make a geometric, V shape.

Can LVT be installed in a herringbone pattern?

LVT planks are ideal for creating a herringbone pattern and will give a durable, long lasting and beautiful floor.

How to fit LVT herringbone flooring

  • LVT needs to acclimatise upon arrival at your home, to make up for the change in temperature between your home and where it was stored prior to delivery. Leaving the LVT for 24 hours reduces the risk of it warping or cracking after installation.
  • While luxury vinyl tiles do not need a traditional underlay, it is vital to prepare the surface your tiles will be installed on. This surface is known as the subfloor and should be concrete, floorboards or ceramic tiles. If your subfloor has carpet, vinyl or lino on it, this should be removed
  • Prepare your subfloor to ensure it is perfectly smooth and even. Remove all nails and tacks etc. and thoroughly vacuum, before repairing any cracks or holes.
  • For concrete floors a thin (3-4mm) layer of smoothing compound can be applied to the surface to ensure the subfloor is completely smooth. Wooden subfloors should have a flooring grade plywood affixed every 120-150mm, with the joins filled so they won’t ‘ghost’ over time.
  • Cut LVT planks with a sharp blade and glue them down, butting each one up tightly to the next.
  • A herringbone pattern should be started in the centre of the room and worked outwards from this central point. Drawing a guide line will help and one corner of the first tile should be lined up to this at a 45 degree angle. Subsequent tiles should be laid at 90 degrees to the previous one. Once the first pattern row has been established and glued down, subsequent rows are added on alternate sides. The overall pattern is created as you add subsequent rows of planks.

Please note: Installation of glue-down LVT planks requires much more skill than click-together planks and is not for the faint-hearted. We do not recommend that a novice DIY-er tackles this kind of installation and would always recommend an approved installation specialist.

LVT herringbone flooring from Floor for Paws

For pet owners wanting a stylish and traditional aesthetic in their home but who worry about the risks from hard, wooden floors to their dogs, the PawSafe domestic range from Floor for Paws is the best flooring for dogs. It is available in a choice of 12 wood-effect patterns perfect for creating a chevron design, with 6 of those available in a smaller plank size ideal for the Herringbone design. All feature a textured, non-slip surface layer to help unstable dogs of any age. The range also offers a comfort layer and fleece backing. All Floors for Paws ranges come with a 30-year domestic guarantee.

To see for yourself, why not order up to three free samples or contact us by email at info@floorsforpaws.com or telephone on 01522 300218 for more information?

Preparing your sub-floor for luxury vinyl plank flooring

Man prepares sub-floor

When preparing your subfloor for luxury vinyl plank (LVP) flooring, it is important to ensure that the surface is level, clean, and free of any debris or obstacles.

Here are some steps you can take to prepare your subfloor for LVP, if your subfloor is concrete:

1. Remove any existing flooring: This includes carpeting, tile, or hardwood. Be sure toremove any nails, staples, or adhesive residue left behind.

2. Inspect the subfloor: Look for any cracks, holes, or uneven areas that need to be repaired. If the subfloor is made of concrete, check for moisture issues by using a
moisture meter.

3. If the moisture reader shows a relative humidity (RH) of over 75% the use of a damp proof membrane is necessary (unless you wish to wait to install your floor until the
concrete is completely dry.

4. A damp proof membrane (DPM) is a layer of material that is installed between the subfloor and the final flooring to prevent moisture from penetrating the surface of the
flooring. It is relatively easy to install and can help to extend the lifespan of your flooring.Remember to also check if the manufacturer of the LVP you choose specifies any other requirement for installing the flooring, such as a vapor barrier.

5. Clean the subfloor: This is important to ensure that there is no dust or debris that can interfere with the application of the latex smoothing compound. Use a broom or vacuum to remove any dirt, dust, or debris.

6. Repair any damage. Use repair mortar or a crack repair kit to repair any uneven areas or cracks in the subfloor.

7. Before installing the LVP, it’s important to make sure that the subfloor is level and dry. Use a self-levelling smoothing compound to smooth them out. 2-3mm of smoothing compound will dry to walk on within 2 hours however will need at least 24 hours to dry sufficiently for the LVP to be adhered to it. With most levelling compounds you need to apply a primer to the subfloor before putting the levelling compound down.

8. Test the subfloor: Before installing the LVP, it’s important to make sure that the subfloor is level and dry. Use a self-levelling compound to smooth them out. 2-3mm of latex will dry to walk on within 2 hours however will need at least 24 hours to dry sufficiently for the LVP to be adhered to it.

By following these steps, you will ensure that your subfloor is properly prepared for the installation of LVP flooring. This will help to ensure that the flooring is installed correctly and will last for many years to come.

Our Pawsafe Domestic range and our Luxury Vinyl range are supplied in a choice of plank or tile options in a range of attractive wood- and stone-effect finishes to satisfy the most house proud amongst us.

Glue Down or Click?

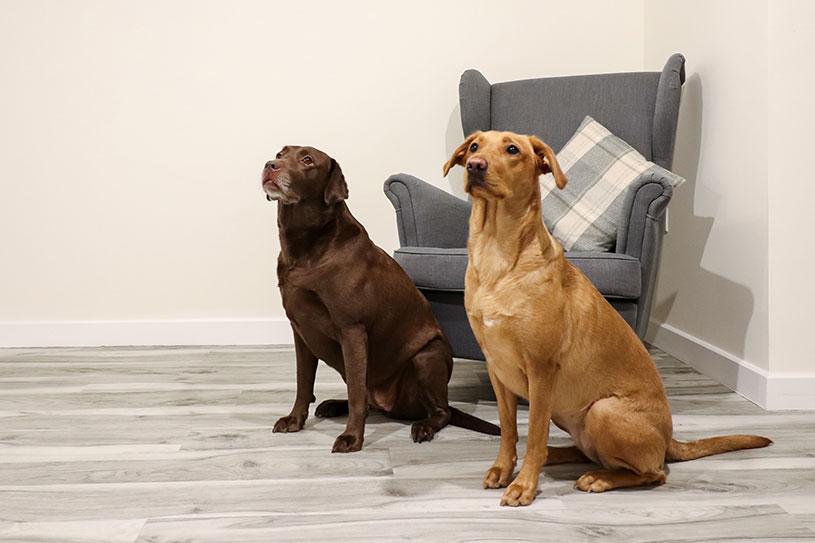
Two dogs on Rockingham floor

Glue Down LVT or Click? A fitter’s perspective;

Luxury Vinyl Tiles used to be a floorcovering few could afford. Now with the arrival of many new brands and manufacturers, it has become a huge growth sector within the flooring industry and with the new build sector installing so much in new homes, the term LVT seems to be a term the buying public are embracing across all walks of life.

From low end budget tiles and planks to top spec designer floors the demand for this kind of floorcovering seems to be ceaseless in the south east of England and seemingly across the rest of the UK.

As a flooring installer of 30 years I am often asked to lay the lock or click together LVTs, these are relatively new player in an established game, but I struggle to see their place in an ever expanding market.

LVT flooring has always been about its versatility, combining wood look planks with stones and metallic styles, adding borders, compasses, hand cut motifs all the skilled parts of the job we’ve been trained to do, that set the Luxury vinyl tile market apart from other flooring – these things aren’t, as far as I have seen, possible with a click or lock system.

The preparation for the dry backed floors is often spoken about as being to expensive and puts the end user off the purchase, but it is my experience that the lock system flooring needs as much and sometimes more preparatory work before the installation can commence and the underlay has to be stuck down I just cannot see a benefit in these floors within the professional flooring industry. I haven’t even touched on the fact these lock tiles need an expansion gap to the perimeter of the room, but they do. I’ve also found that in direct sunlight such as an orangery or in front of patio doors, these lock tiles seem to ‘tent’ in the heat that is to say the tiles expand against each other pushing on the joint causing the tiles to lift and look extremely unsightly. With dry backed tiles we have high temperature adhesives to overcome such issues. During the hot summer we have just had in 2018 I looked at, at least 5 jobs fitted by others that had failed in this way.

Then there’s the maintenance, a dry back tile damaged by the end user can easily be lifted and replaced by a decent installer, whilst the lock tiles are replaceable it’s a substantially longer process to do and far more invasive.

Despite my negativity I do see that these lock together tiles have a place in the DIY market, and maybe even for commercial use where flooring can be installed and removed with little fuss to for example a retailer of office environment – but if you want a statement floor, that is unique to you and your home dry backs such as the Paws for Floors range are the way to go, the Floors for Paws can easily be laid with a single plank border or fitted at 45 degrees without the need for an expansion gap or unsightly mastic to the perimeter making them in my opinion an exceptional choice for those with or without pets.

Richard Fordham
Registered installer for Floors For Paws LTD

https://www.trustatrader.com/traders/r-fordham-flooring-carpet-repairs-southend-on-sea

Check out our glue down luxury vinyl planks today and ensure you are getting the best flooring for you and your dog

Rigsby pet friendly holiday cottages – The Stables

Dogs on Greenwood LVT

Rigsby holiday cottages are ideally located for escapism in the picturesque parish of Rigsby, which is in the Lincolnshire Wolds – a designated area of outstanding natural beauty (ANOB). Rigsby is just 2 miles from Alford – renowned for its arts & crafts and striking five-sailed windmill. The holiday cottages are perfect for walkers and cyclists, with multiple public footpaths and cycle routes on the doorstep.

Within easy reach of the award winning, golden-sanded coastal resorts of Mablethorpe and Sutton on Sea. Louth, the capital of the Lincolnshire Wolds, is 10 miles away and the historic city of Lincoln is under an hour away.

Already With Two beautifully renovated holiday cottages the family wanted to offer another pet friendly option for their guests by renovating The Stables. So who better to turn to than Floors For Paws – The World’s best flooring for dogs and dog owners!

As farming has changed, Rigsby Farming Company, has ended up with a number of redundant buildings. We opened our first holiday cottage in 2008 and adding a second holiday cottage in 2014. The first holiday has always been the more popular one and we think this is because it is pet friendly and Rigsby in the Lincolnshire Wolds is surrounded by lots of great walks from the cottage door steps. So when we decided to convert an unused barn to make our third holiday cottage, we knew we wanted it to be very pet friendly. Great looks, longevity, paw friendly and easy clean helped us quickly settle on Floors For Paws. We selected Greenwood and it really hits the mark to give the holiday cottage a barn conversion look that also matches the contemporary interior finish we wanted to attract guests and of course their pets. Paul Read – Owner @ Rigsby Holiday cottages.

The Greenwood design worked beautifully with the original natural wood in the building.

Floors For Paws is 100% waterproof and due to its double wear layer protection it really is the best flooring for dogs and dog owners.

Floors For Paws worked closely with The Rigsby Farming company to provide the perfect fit for their vision, all the way through the process from discussing colour, to organising installation and aftercare. Call us today on 01937 830948 to help with your project.

For more information about staying at this beautiful holiday cottage please visit; http://rigsbywoldholidaycottages.uk or call 01507 463404

Preparing your floor for Floors for Paws

Preparing you floor

To ensure you have a lifetime of hassle free flooring it is essential to have your sub-floor prepared in the correct manner. If you have a perfectly smooth and dry sub-floor you can simply adhere Floors For Paws directly onto it. Unfortunately this is rarely the case, so we would like to look at the best solutions.

Latex sub-floor
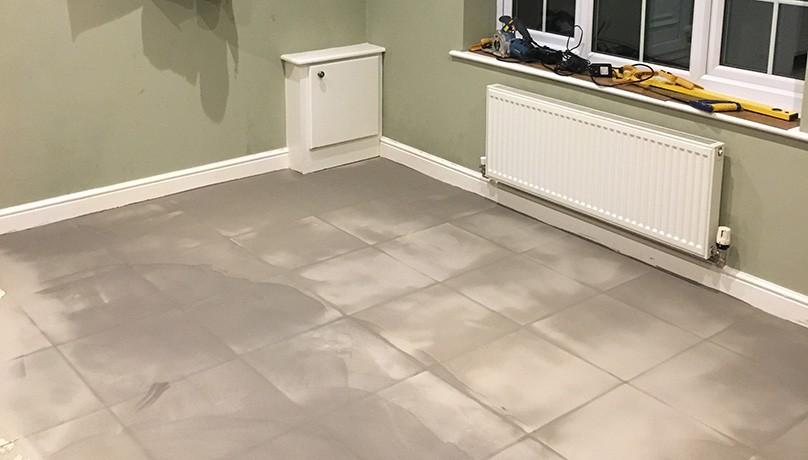
This option is a quick and trusted process to ensure your FFP is fitted onto a suitable base. It is used on existing concrete floors that need to be smooth and levelled. Quick drying options such as the Stopgap 300 is ready to walk on in 2 hours and to work on in 4. This solution is also ideal for going over existing tile floors (who wants to take out all the tiles and build up again!) The photo below shows a kitchen diner before and after being latexed. As you can see the grout lines show through while it is drying but as long as 3-4mm is applied onto the tiles the surface will dry completely smooth.


1. Tiled floor


2. Two hours post latex


3. Floors for Paws Greenwood flooring

SP101 Ply board – Flooring Grade
Ply board should be used over existing wood flooring, or when you need to bring up the level of the floor by over 4mm. In the case below the carpet that was removed was 10mm and therefore too deep to apply a latex without the need for Grano chippings. This depth of latex would take two months to dry! The 9mm ply board is cut into place and secured with mechanical fixings at regular intervals to ensure no movement. The ply board is then ready for FFP to be adhered directly onto it. We recommend a minimum of a 6mm ply board base.


4. Build up with 9mm ply


5. Floors for Paws Wychwood flooring

If you are not a DIY nut; don’t worry because our recommended installers can carry out the preparation and installation for you.

Here our superb installation engineer John carries out fitting of 130 sqm of Greenwood to Rigsby Wold Holiday cottages new accommodation. For more details on this Dog friendly holiday please visit Rigsby Wold Holiday Cottages.

Call us today to discuss any aspect of your project on 01937 830948.